
What’s on the telly ?

A partially successful attempt to MITM the TV
Right well I finally got around to getting a “smart” TV, i.e. a TV that is capable of detecting what I’m watching and then selling that information to data brokers who then sell it to advertisers .
The TV I ended up getting was a LG 55QNED81SRA, and as an incorrugible couch potato, I thought it’d be grouse to get some stats on how much of my life I spend splaid out on the settee.
What I had intended to do was to get a rasberry pi with a couple of ethernet ports, stick that in the cable leading out of the TV, and inspect the traffic getting sent down the wire. Of course everything’s going to be encrypted, so I was planning on MITM-ing the SSL connections, which would probably involve adding a new CA certificate to the telly to get it to trust the raspi-in-the-middle, which would probably involve rooting the TV.
So once I’d done that, it turns out that the apps that use the builtin browser app ( i.e. the apps for ABC, 7, 9, 10, SBS, Binge ) can be intercepted, but the other apps ( i.e. Netflix, Stan, Apple TV etc ) can’t as they use certificate pinning, or at least that’s my theory at the moment.
tl;dr It sort of works
The current plan is to write it up so that (a) I can remember what the hell I did to my TV a year from now, and (b) save anyone else thinking of doing this the hassle, with the possibility that someone out there actually gets this to work, notices my current dilemma, and then decides to tell me how to do it properly in the comments below.
This is how I choose to spend my christmas holidays, incidentally.
So I got a few pointers from the discord channel and got a bit further, I’ve updated this post but there’s still a couple of things to try which I’ll have burl at later on.
Bits and bobs
OK so what I’ve got is:
- a “smart” TV
- couple of ethernet cables
- a raspberry pi compute module (CM4) with a bit of storage on it, and
- a box to clip it into with a couple of ethernet ports
- that’s probably about it
The plan
The way this is going to be set up is that I’ll be SSHing into the raspberry pi over it’s wi-fi interface (wlan0), with the big cable from the router to the raspi plugged into eth0, the little cable from the raspi to the TV will plugged into eth1. You could probably SSH in via eth0 as well, but I really don’t trust my ability to keep that connection functioning whilst faffing about with iptables rules.
All the devices are wi-fi enabled, so I could have probably avoided the cables altogether, but I have a natural aversion to broadcasting my network traffic over the airwaves, unlike the rest of the world, apparently.
So the TV is going to live in a new subnet separate from the rest of the home network. My home router is on 192.168.0.1 with hosts on the 192.168.0.x subnet, so I went with 192.168.4.x for the TV-facing side of the network. The TV itself going to be on 192.168.4.100, and the raspi is going to straddle those networks on 192.168.4.1 and 192.168.0.138.
So something like this:
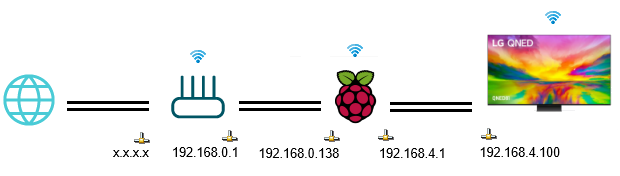
The raspi is going to run a squid transparent proxy which intercepts HTTP and HTTPS traffic, and also a dnsmasq server to dole out the one solitary IP address to the TV on the 192.168.4.x network.
On the TV:
So there’s a few ways of rooting the TV, other than the way you’re probably thinking, if you’re Australian. The one I chose to use was the crashd exploit here, which uses the webOS developer toolkit + a poorly configured crashd daemon, which is the daemon responsible for crash diagnostics, apparently. So if you’re thinking of doing any of this, maybe read through that page a few times, as there’s a risk you’ll brick your TV if you stuff it up.
WebOS is the linux-based operating system the TV uses, and the version of WebOS this TV has is 8.1.0-4805 (number1-nairobi), which is based on linux 5.4. It’s running firmware version 03.11.55. Anything from 03.30.60 onwards won’t work, so don’t update your firmware.
So anyway, from the ‘Apps’ tile on the TV’s home screen, I installed the “Developer Mode” app, signed up for a developer account, entered those account details in the developer kit thing which then put the TV into developer mode.
Then installed the WebOS SDK on my laptop, and the homebrew installer ( dev manager ), and then installed the webOS ‘homebrew’ app which gives you access to a small set of horrifically low-quality apps like the ones you used to be able to get on a first generation ipod touch if the word “cydia” means anything to you at all.
What homebrew also does is give you telnet access to the TV, from which you can run a few commands and scripts, which will cause the homebrew app to tell you that the TV is rooted after you reboot it two or three times.
What you then do is uninstall the developer kit thing, and enable SSH in homebrew so that you’re not telnetting around, and switch off automatic OS updates.
On the raspberry pi:
Come up with a hilarious name for the device. I’m going with sorbet, as ‘beret’ was already taken by the other raspberry pi I set up ages ago and definitely didn’t leave in a drawer over there gathering dust.
To get that running, I installed the raspi imager, used that to install whatever the latest 64-bit linux distro is (as of writing, Debian Bookworm), and once that’s installed, reboot it, ssh into it using the IP address discovered off the router, then grabbed the MAC addresses and assigned those some IP addresses in my DHCP server, and then set a static IP on the tv-facing side of the pi.
Static IP
Spent a fair amount of time trying to google how to set a static IP on this thing, which is made arbitrarily more difficult by the purveyors of pi reinventing their network stack again . The approved way in bookworm appears to be using “nmcli“, which uses connection names rather than device names. So to configure those, do this:
knoxg@sorbet:~ $ sudo nmcli c show
NAME                  UUID                                  TYPE      DEVICE
Wired connection 2    b9e86596-f07f-3af4-9bc6-d06e3ebef75b  ethernet  eth1
Wired connection 1    c38126f3-4849-3c24-9aba-c42cd14e3892  ethernet  eth0
Grasshopper-NBN-5GHz  c68e7dcc-256d-444a-b619-9ab3d63af5f9  wifi      wlan0
lo                    53226046-3865-4402-a382-aa90b69e811a  loopback  lo

knoxg@sorbet:~ $ sudo nmcli c mod 'Wired connection 2' ipv4.addresses 192.168.4.1/24 ipv4.method manual
knoxg@sorbet:~ $ sudo nmcli c down 'Wired connection 2' && sudo nmcli c up 'Wired connection 2'
knoxg@sorbet:~ $ ifconfig
And then installed a bunch of things which I definitely wrote down earlier.
- dnsmasq
- iptables
- squid
Installing dnsmasq
knoxg@sorbet:~ $  sudo apt update -y && sudo apt upgrade -y
knoxg@sorbet:~ $  sudo apt-get install dnsmasq
knoxg@sorbet:~ $  sudo apt-get install dnsutils telnet
knoxg@sorbet:~ $  sudo shutdown -hP now

## after a reboot

knoxg@sorbet:~ $  sudo bash -c 'cat >/etc/dnsmasq.d/sorbet.conf' <<'EOF'
# settings for sorbet

# log settings
log-facility=/var/log/dnsmasq.log

# dns settings
log-queries
domain-needed
bogus-priv
interface=eth1
# bind-interfaces

# prevent webOS upgrades
address=/aic.rdl.lgtvcommon.com/127.0.0.1
address=/lgtvonline.lge.com/127.0.0.1
address=/us.lgtvsdp.com/127.0.0.1
address=/aic.recommend.lgtvcommon.com/127.0.0.1
address=/snu.lge.com/127.0.0.1
address=/ueiwsp.com/127.0.0.1

# dhcp settings
log-dhcp
domain=mul.randomnoun
dhcp-range=192.168.4.200,192.168.4.250,12h

# TV was 192.168.0.x, now its going to be 192.168.4.100
dhcp-host=64:e4:a5:55:6d:67,tv,192.168.4.100,12h

# Override the default route supplied by dnsmasq, which assumes the
# router is the same machine as the one running dnsmasq.
dhcp-option=option:router,192.168.4.1
EOF

knoxg@sorbet:/etc/dnsmasq.d $ sudo service dnsmasq restart
knoxg@sorbet:/etc/dnsmasq.d $ sudo less /var/log/dnsmasq.log
The 64:e4:a5:55:6d:67 bit is the MAC address of my TV, which is under Settings -> General -> Network -> Wired Connection.
Enabling routing and iptables
Then enabled IP routing,
knoxg@sorbet:/etc/dnsmasq.d $ sudo vi /etc/sysctl.conf   # uncommented 'net.ipv4.ip_forward=1'
knoxg@sorbet:/etc/dnsmasq.d $ sudo sysctl net.ipv4.ip_forward=1
And added some iptables rules to send packets received on eth1 (from the tv) through to eth0 (the router). The iptables-persistent package will reapply the rules if the raspberry pi restarts.
knoxg@sorbet:~ $ sudo apt-get install iptables
knoxg@sorbet:~ $ sudo apt-get install iptables-persistent
knoxg@sorbet:~ $ sudo systemctl is-enabled netfilter-persistent.service # should be 'enabled'
knoxg@sorbet:~ $ sudo systemctl enable netfilter-persistent.service     # if it isn't

knoxg@sorbet:~ $ sudo bash -c '/sbin/iptables-save > /etc/iptables/rules.v4'
knoxg@sorbet:~ $ sudo cp /etc/iptables/rules.v4 /etc/iptables/rules.v4.orig

knoxg@sorbet:~ $ sudo iptables --list-rules
knoxg@sorbet:~ $ sudo iptables -t nat -A POSTROUTING -o eth0 -j MASQUERADE
knoxg@sorbet:~ $ sudo iptables -A FORWARD -i eth0 -o eth1 -m state --state RELATED,ESTABLISHED -j ACCEPT
knoxg@sorbet:~ $ sudo iptables -A FORWARD -i eth1 -o eth0 -j ACCEPT
knoxg@sorbet:~ $ sudo iptables --list-rules
knoxg@sorbet:~ $ sudo bash -c '/sbin/iptables-save > /etc/iptables/rules.v4'
Checking that all works
From here you should be able to telnet / ssh to the TV, and from there test that the network is still available.
knoxg@sorbet:~ $ ssh root@192.168.4.100
root@192.168.4.100's password:
NEVER EVER OVERWRITE SYSTEM PARTITIONS LIKE KERNEL, ROOTFS, TVSERVICE.
Your TV will be bricked, guaranteed! See https://rootmy.tv/warning for more info.

 /!\ Your system is using a default password.
 /!\ Insert SSH public key into /home/root/.ssh/authorized_keys and perform a reboot to remove this warning.

root@tv:~# curl -vvv http://www.google.com   # test HTTP access
root@tv:~# curl -vvv https://www.google.com  # test HTTPS access
root@tv:~# exit
Connection to 192.168.4.100 closed.
Take note of that warning about not changing the fileystems. I can’t seem to to dig up much detail about it, but apparently webOS verifies the signatures of its filesystems. It’s probably a UEFI thing, although I don’t really know how that works. So you can only change things in certain places, and then use overlay mounts to make those changes appear in the places you want them to appear.
Installing squid
Back on the raspberry pi, you’ll need the squid package that has the openssl libraries included, not the other one.
knoxg@sorbet:~ $ sudo apt-get install squid squid-openssl
knoxg@sorbet:~ $ cd /etc/squid/

knoxg@sorbet:/etc/squid $ sudo bash -c 'cat >/etc/squid/conf.d/sorbet.conf' <<'EOF'
# SSL-related config adapted from https://www.reddit.com/r/PFSENSE/comments/ijp8nz/is_it_even_possible_to_run_an_ssl_mitm_squid/

http_access allow all
http_upgrade_request_protocols websocket allow all

acl step1 at_step SslBump1
acl step2 at_step SslBump2
acl step3 at_step SslBump3

# splice domains that don't work
# file should be plain text, 1 domain per line in the format
# .example.tld
acl broken_sites ssl::server_name "/etc/squid/ssl_broken_sites.txt"

# was using this to skip some IPs when this failed to work
# acl broken_ip dst 40.112.195.32
# acl broken_ip dst 104.110.68.93
# ssl_bump none broken_ip

# SSL Bump Commands
ssl_bump peek step1 all
ssl_bump splice broken_sites
ssl_bump stare step2 all
ssl_bump bump step3 all

visible_hostname sorbet.mul.randomnoun

# port 3128 already opened in the main /etc/squid/squid.conf file
# http_port sorbet.mul.randomnoun:3128
http_port sorbet.mul.randomnoun:3129 intercept
https_port sorbet.mul.randomnoun:3130 intercept ssl-bump generate-host-certificates=on \
  dynamic_cert_mem_cache_size=4MB \
  cert=/etc/squid/certs/cacert.pem \
  key=/etc/squid/certs/cacert-key.pem

sslcrtd_program /usr/lib/squid/security_file_certgen -s /var/lib/squid/ssl_db -M 4Mb
EOF
I’m using ‘.mul.randomnoun‘ as the domain for the multimedia subnet.
You’ll need to create a CA for squid, which if you’re anything like me, you’ll already have, due to that k8s time sink you’ve got running that doesn’t use letsencrypt.
knoxg@sorbet:/etc/squid $ sudo mkdir certs
knoxg@sorbet:/etc/squid $ cd certs
knoxg@sorbet:/etc/squid/certs $ sudo vi cacert.pem      # and paste that in
knoxg@sorbet:/etc/squid/certs $ sudo vi cacert-key.pem  # and paste that in
knoxg@sorbet:/etc/squid/certs $ ls -l
total 8
-rw-r--r-- 1 root root 3268 Dec 20 16:42 cacert-key.pem
-rw-r--r-- 1 root root 2114 Dec 20 16:42 cacert.pem
knoxg@sorbet:/etc/squid/certs $ sudo chmod 600 cacert-key.pem
And create the ssl_db thing, otherwise squid won’t start:
knoxg@sorbet:/etc/squid $ sudo /usr/lib/squid/security_file_certgen -c -s /var/lib/squid/ssl_db -M 4MB
knoxg@sorbet:/etc/squid $ sudo chown -R proxy /var/lib/squid
And restart the server:
knoxg@sorbet:/etc/squid $ sudo service squid restart
knoxg@sorbet:/etc/squid $ sudo service squid status
knoxg@sorbet:/etc/squid $ service --status-all

knoxg@sorbet:/etc/squid $ sudo less /var/log/squid/cache.log   # check for startup errors
knoxg@sorbet:/etc/squid $ sudo less /var/log/squid/access.log  # check for network traffic
Updating iptables
OK so this is what you need to do to get HTTP/HTTPS connections from the TV getting funnelled through squid:
knoxg@sorbet:/etc/squid $ sudo iptables -t nat -A PREROUTING -i eth1 -p tcp --dport 80 -j REDIRECT --to-port 3129
knoxg@sorbet:/etc/squid $ sudo iptables -t nat -A PREROUTING -i eth1 -p tcp --dport 443 -j REDIRECT --to-port 3130
knoxg@sorbet:/etc/squid $ sudo bash -c '/sbin/iptables-save > /etc/iptables/rules.v4'
and then you can watch the squid logs to see what happens:
knoxg@sorbet:/etc/squid $ sudo less /var/log/squid/access.log
Installing the CA certificate on the tv:
Install the CA on the TV using this script. Create the script as /tmp/update-ca-certs.sh, make it executable, and run it to create a boot script which will install the certificate.
It’ll reboot when it completes but I imagine you’ll comment that bit out to check it worked properly, in which case you’ll need to reboot the TV for the boot scripts to take effect.
#!/bin/bash

# Adapted from https://github.com/tf318/lg/blob/main/update-ca-certs.sh

# Adds the randomnoun cacert to the trust store
# Create a post-boot script to overlay this cert data over the readonly filesystem and reload CA cert config on boot

export PURPOSE="Add randomnoun CA"

export STARTUP_SCRIPTS_DIR=/var/lib/webosbrew/init.d

export CERT_FIX_SCRIPT=${STARTUP_SCRIPTS_DIR}/randomnoun-ca-cert-overlay
export CERT_FIX_DIR=/home/randomnoun-ca-cert-overlay

if [ ! -d "${STARTUP_SCRIPTS_DIR}" ] ; then
cat << EOM
----------
FIX FAILED
----------

Error: Homebrew Channel init.d directory does not exist

       ${STARTUP_SCRIPTS_DIR}

Before running this script, ensure you have rooted your TV.

EOM
exit 1
fi

if [ ! -f "${CERT_FIX_SCRIPT}" ]; then

        mkdir -p ${CERT_FIX_DIR}/etc_ssl/upper/
        mkdir -p ${CERT_FIX_DIR}/etc_ssl/work/
        mkdir -p ${CERT_FIX_DIR}/etc_pki/upper/
        mkdir -p ${CERT_FIX_DIR}/etc_pki/work/
        mkdir -p ${CERT_FIX_DIR}/usr_share_ca-certificates/upper/
        mkdir -p ${CERT_FIX_DIR}/usr_share_ca-certificates/work/

        # if you run this script multiple times, this ends up adding the certificate multiple times
        # (seems OK)
        echo "Adding randomoun CA certificate..."
        cp /etc/ca-certificates.conf ${CERT_FIX_DIR}/fixed-ca-certificates.conf

cat <<EOF >"${CERT_FIX_DIR}/usr_share_ca-certificates/upper/randomnoun.crt"
-----BEGIN CERTIFICATE-----
MIIF7TCCA9WgAwIBAgIUFMPkXke2j7uuzldHYxOwR23JqMgwDQYJKoZIhvcNAQEL
BQAwgYQxCzAJBgNVBAYTAkFVMQwwCgYDVQQIDANRTEQxETAPBgNVBAcMCEJyaXNi
... the CA certificate goes here ...
kpc4j3Q+JasQ6Z/mElHq65auaXYTtKwC6NVib6nQnB+PFe6z9exfXIOMT5CrEBlH
RnwUf47R+lsNy6JOoKcVWPndeih4ylu15CU9AKaM0YftdCwnmy9cnx+lKLSar0/O
5432RmvmFekLSwu0tp8CiuaMo7ZL4CgtJ6fvSxzFor2B
-----END CERTIFICATE-----

EOF

        echo "randomnoun.crt" >> ${CERT_FIX_DIR}/fixed-ca-certificates.conf

        echo
        echo "Creating startup certificate overlay script..."

        echo "#!/bin/bash" > ${CERT_FIX_SCRIPT}
        echo "# ${PURPOSE}" >> ${CERT_FIX_SCRIPT}
        echo "set -e" >> ${CERT_FIX_SCRIPT}
	echo "mount --bind ${CERT_FIX_DIR}/fixed-ca-certificates.conf /etc/ca-certificates.conf" >> ${CERT_FIX_SCRIPT}
        echo "mount -t overlay overlay -o lowerdir=/etc/ssl,upperdir=${CERT_FIX_DIR}/etc_ssl/upper,workdir=${CERT_FIX_DIR}/etc_ssl/work /etc/ssl" >> ${CERT_FIX_SCRIPT}
        echo "mount -t overlay overlay -o lowerdir=/etc/pki,upperdir=${CERT_FIX_DIR}/etc_pki/upper,workdir=${CERT_FIX_DIR}/etc_pki/work /etc/pki" >> ${CERT_FIX_SCRIPT}
        echo "mount -t overlay overlay -o lowerdir=/usr/share/ca-certificates,upperdir=${CERT_FIX_DIR}/usr_share_ca-certificates/upper,workdir=${CERT_FIX_DIR}/usr_share_ca-certificates/work /usr/share/ca-certificates" >> ${CERT_FIX_SCRIPT}

        # changes in /etc/ssl and /usr/share from here change the overlay filesystem, not the original filesystem
        echo "update-ca-certificates" >> ${CERT_FIX_SCRIPT}
        echo "c_rehash" >> ${CERT_FIX_SCRIPT}
        echo "cat ${CERT_FIX_DIR}/usr_share_ca-certificates/upper/randomnoun.crt >> /usr/share/ca-certificates/sdp/sdp-ca.pem" >> ${CERT_FIX_SCRIPT}
        echo "cat ${CERT_FIX_DIR}/usr_share_ca-certificates/upper/randomnoun.crt >> /etc/ssl/certs/trusted_cas.crt" >> ${CERT_FIX_SCRIPT}
        echo "certutil -d /etc/pki/nssdb/ -A -t 'C,,' -n randomnoun -i /usr/share/ca-certificates/randomnoun.crt" >> ${CERT_FIX_SCRIPT}
        echo "cp -Tr /etc/pki/ /var/palm/jail/com.webos.app.browser/etc/pki/" >> ${CERT_FIX_SCRIPT}
        echo "" >> ${CERT_FIX_SCRIPT}

        chmod a+x ${CERT_FIX_SCRIPT}

        echo
        echo "randomnoun CA configuration complete. Rebooting to apply fix..."

        reboot
else
cat << EOM2
-------------------
FIX ALREADY APPLIED
-------------------

It looks like the fix was already in place.

If you are sure it was not working, please delete the following file:

        ${CERT_FIX_SCRIPT}

Then re-run this script ($0).

EOM2
fi
If it works, it will install the certificates to these locations on startup:
-
/usr/share/ca-certificates/randomnoun.crt -
/etc/ca-certificates.conf -
/usr/share/ca-certificates/sdp/sdp-ca.pem -
/etc/ssl/certs/ca-certificates.crt -
/etc/ssl/certs/trusted_cas.crt -
/etc/pki/nssdb -
/var/palm/jail/com.webos.app.browser/etc/pki/
Discovering it almost works
Once you’ve run that and rebooted, you can try those curl commands to see if those requests are getting MITMed by squid:
root@tv:~# curl -vvv http://www.google.com   # test HTTP access
root@tv:~# curl -vvv https://www.google.com  # test HTTPS access
And all things going well, you should be able to intercept traffic from the handful of apps that use the com.webos.app.browser app.
Other apps will fail with these kinds of messages:
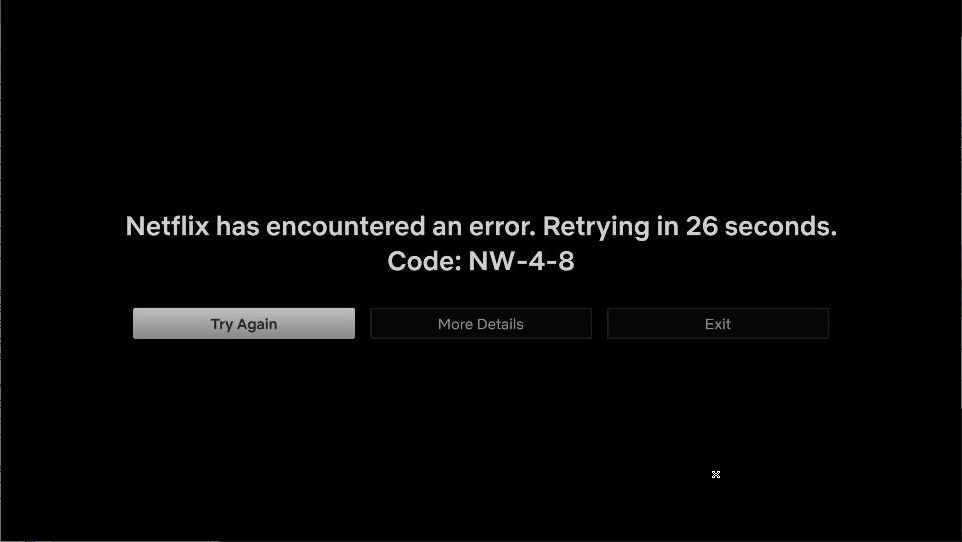 The error message for Netflix The error message for Netflix
|
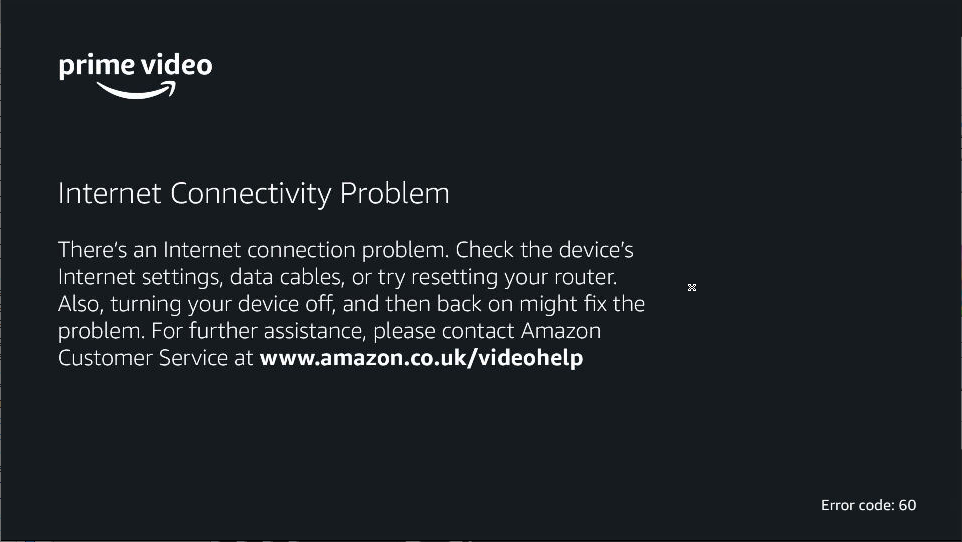 The error message from Prime The error message from Prime
|
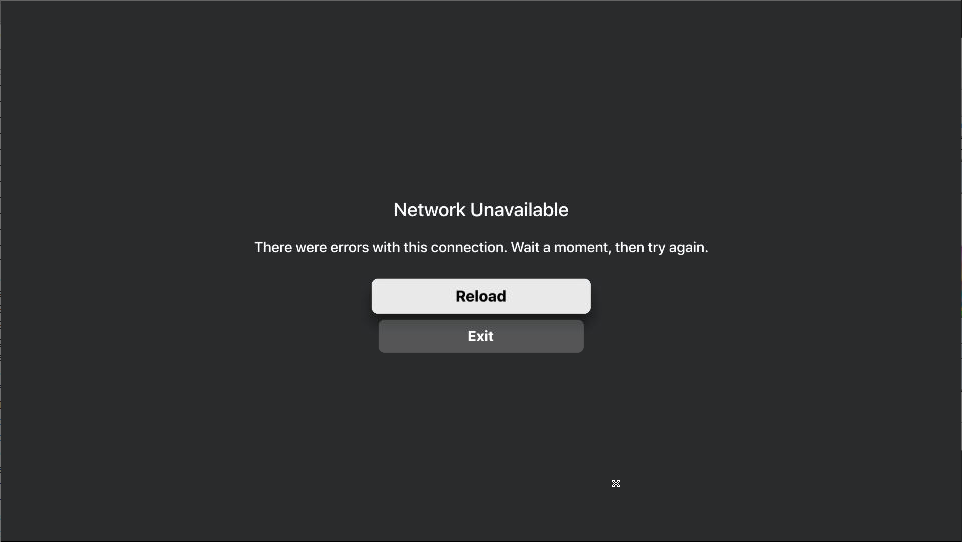 The error message from Apple TV The error message from Apple TV
|
 The empty void from Youtube and Binge The empty void from Youtube and Binge
|
The reason those apps don’t work is they appear to use certificate pinning to prevent this kind of MITM shenanigans.
It might be possible to remove the pinning though. The apps are installed as IPKs, and there’s some other apps that exist which will remove certificate pinning from IPKs, but I don’t see anyone successfully using that on apps running on a TV. Edit: that won’t work .
So after chatting in the discord server, there might be a couple of other things to try, and if/when I do that I’ll update this post.
Failing that, I’ll probably just set up some BGP filters to capture how much network traffic gets sent to different content providers, but I’m assuming they all go through the same CDNs so that’s probably not going to be all that infotaining.
The End.
Oh, to remove those iptables rules to get those apps running again, you’ll need to do this from the raspi:
knoxg@sorbet:~ $ sudo iptables -t nat -v -L PREROUTING -n --line-number   # view rules
knoxg@sorbet:~ $ sudo iptables -t nat -D PREROUTING 2                     # delete rules
knoxg@sorbet:~ $ sudo iptables -t nat -D PREROUTING 1
knoxg@sorbet:~ $ sudo bash -c '/sbin/iptables-save > /etc/iptables/rules.v4'
Update 2023-12-30: Forgot to put the nat and forwarding iptables rules above, so added those in, and reordered some of the steps.
Update 2024-01-28: Added the /var/palm/jail/com.webos.app.browser/etc/pki/ bit, which allows MITMing some of the apps at least
- notifying LG via their privacy page, which has links to various third parties, and from where you can “explore your options for opting out of the sale of your personal data”
- notifying the data brokers that LG uses via the Digital Advertising Alliance webapp, which it turns out doesn’t actually work
- not agreeing to the ts & cs in your TV, which unfortunately means you can’t use the microphone in your remote control, but hey, like anyone uses that after the novelty wears off
- clicking on half a dozen separate menu items in the TV settings menu:
- General -> AI Service -> disable everything
- General -> AI Service -> AI Recommendation -> disable everything
- General -> Programmes -> HbbTV -> disable ‘Provide HbbTV Distinctive ID’
- General -> Programmes -> HbbTV -> enable ‘Do Not Track’
- General -> System -> Home Settings -> disable ‘Home Promotion’
- General -> System -> Home Settings -> disable ‘Content Recommendation’
- General -> System -> Additional Settings -> disable ‘Live Plus’
- Support -> Privacy & Terms -> User Agreements
- deselect ‘Viewing Information Agreement’
- deselect ‘Voice Information’
- deselect ‘Interest-Based Advertisement Agreement’
- deselect ‘LG Channels Service’
unless you opt out of that, which you can easily do by:
obviously
which appears to be the one thing everyone agrees needs to change in every release of every operating system
these are IPKs, not APKs. Whole different kettle of fish


